Wednesday, February 24, 2016

Hot Buttered Rum Cupcakes

     It snowed recently. We got a whole 4 inches! Of course, in North Carolina that's what happens when a blizzard rolls through. That, and closure of pretty much every school, business, and backroad for a few days. We couldn't even leave our parking lot for 3 days after 4 inches of  snow.


       I spent some of that snow day time whipping up a a batch of these Hot Buttered Rum Cupcakes. The recipe came from the "Prohibition Bakery" cookbook I got for Christmas from my brother. The book is full of mixed drink recipes converted into lovely, scrumptious, boozy cupcakes. It was brutally cold those snowy days and when reading through the recipes, this one stood out as warm and cozy. If you've ever had a Hot Buttered Rum drink on a cold, winter evening...well, you know that these appeared to be the perfect baking plan for a snowy winter day.


      My official review of these cupcakes would fall somewhere in between perfect-warm-from-the-oven and TOO-sweet-to-just-grab-and-eat. Hot Buttered Rum as a warm drink is generally sweet, but the combination of sweet vanilla cupcake, caramel filling, and sweet rum flavored frosting was a bit of a sucrose overload. The cupcakes were perfectly fluffy, the frosting beautifully smooth, and the caramel was delicious. I made these as full sized cupcakes because I only had regular cupcake liners, but maybe there was a reason they  made these (and every recipe in the book) in miniature! I'll have to test out another recipe and let you know..

     The directions were multitudinous. As I was typing this post I had a deja-vu moment back to when I was baking the cupcakes and felt overwhelmed by the directions. They took quite a while from start to finish! I think there could be a simpler way to make these, but I haven't experimented with that yet. Additionally, you WILL use ALL of your pots, pans, and measuring utensils (and probably your stash of butter in the fridge too) making these. All of them. Ask my husband. I did so many dishes during those snow days, that it's put me off from baking since (well, not true, but it did put me off baking for a day or two).

I believe that this picture substantiates that I overcooked my caramel just a bit. But it was amazing to eat when warmed up!


Hot Buttered Rum Cupcakes
taken From "Prohibition Bakery" page 101
by Leslie Feinberg and Brooke Siem

Ingredients:

Filling 
1 cup sugar
4 tablespoons (2 oz) butter
1/2 cup heavy cream
1 pinch salt
1/4 cup dark rum
                                                                                   Frosting
Cake                                                                          1 pound powdered sugar
1 egg                                                                          1 stick butter
1/3 cup sour cream                                                    1/3 cup dark rum
1 and 1/3 cups all purpose flour
1 cup sugar
3/4 teaspoon baking soda
1/2 teaspoon cinnamon
1/2 teaspoon nutmeg
1/2 teaspoon salt
1/2 cup water
1 stick unsalted butter

Preparation: 

Filling  (My input- up to a day ahead of making the cupcakes, prepare the filling using the following instructions)
1. In a saucepan, heat sugar and butter over medium heat until butter is melted and the mixture appears smooth (not grainy). After a few minutes, the mixture will bubble and turn a nice golden color.
2. While the sugar and butter mixture is melting, warm cream over low heat, taking care not to boil it.
3. When the sugar is fully dissolved in the sugar/butter mixture, slowly stream in the warm cream, stirring constantly.
4. Add a pinch of salt and stir thoroughly
5. Once everything is fully mixed, slowly pour in the rum, stirring constantly until the mixture is smooth and even in color.
6. The caramel will appear thin when hot but will thicken significantly when cooled.
7. Transfer the caramel to a squeeze bottle and let it cool before filling cupcakes.

Frosting (My input- make the brown butter for the frosting (steps 1-5) up to a day ahead of time, but at least 2-3 hours ahead of time, to allow the butter to set again before mixing frosting) 
1. Heat butter in saucepan over low heat until it is fully melted.
2. Turn the heat up to medium high, keeping a close eye on the butter. Stir constantly, taking care to scrape the bottom of the pan.
3. Remove the pan from the heat once the butter begins to take on an amber color and smell faintly nutty, and little flecks of browned butter are visible. Keep a close watch over your butter at this point. The difference between browned butter and burnt butter is a matter of seconds.
4. Transfer butter to a heat proof container, taking care to scrape every last fleck of browned goodness out of the pan.
5. Cool in the refrigerator.
6. Allow browned butter to soften again, then combine with confectioners sugar in a standing mixer on low speed.
7. Slowly add dark rum and beat until fluffy.
8. Transfer the frosting to a piping bag.

Cupcakes
1. Preheat the oven to 325 degrees. Line mini cupcake tins with paper liners.
2. In the bowl of an electric mixer, beat egg and sour cream. Set aside. (I just left mine in the stand until step 5) 
3. In another bowl, combine flour, sugar, baking soda, cinnamon, nutmeg, and salt. Set aside.
4. Combine water and butter in a saucepan and heat until the butter melts.
5. Remove from heat. With the mixer on low speed, slowly pour the hot water/butter mixture into the mixing bowl containing the egg/sour cream mixture. Beat until incorporated.
6. Slowly add the dry ingredients to the wet ingredients and beat until incorporated.
7. Fill cupcake tins 2/3 full.
8. Bake for 10 minutes. Let cupcakes cook completely on a wire rack before filling or frosting.

Assembly
1. When the cupcakes are cool, core the cupcakes with a narrow bladed knife.
2. Fill each cupcake with the rummy caramel, taking care not to let it overflow.
3. Frost to your liking. (I piped using a large round tip)
4. Garnish with a sprinkle of brown sugar, if desired (I did not!)

Sunday, January 31, 2016

Double Chocolate Cookies

Source: Buzzfeed
     Back in October I had a BAD case of Bronchitis. I was home sick for a week, and needed something to do to keep myself "resting" on the couch. I perused Neflix for an addicting new show, and lo and behold, found a winner. It's called "The Great British Baking Show." I think now it's just called the Great British Bake Off, but on Netflix the first season had a different name.


     Anyway, I plowed through the series in two days. It was so interesting! The challenges were unique and complicated, the mix of personalities between the competitors was engaging to watch, and the judging was fair. I especially like how they are able to practice two of their recipes beforehand, but the third one is a complete surprise with vague directions. Plus, you know, cute little background video of baby goats, bad (BAD) puns by the hosts, and all the drama of "Will it cook in time? Is it going to be too dry? Those look horrible, I bet he/she gets sent home" makes it worthwhile to watch.

     In case you weren't convinced you need to go watch this show now, I'll mention that one of the judges is named Mary Berry. I kid you not, that is her name! I even looked her up to see if she'd changed her name to match her baking profession, but didn't find anything conclusive. I'll keep looking. She is a cute little grandma you want to keep in your pocket, but then you're afraid she'll tell you that your cooking is too dry or not evenly baked. And you don't want to disappoint Mary Berry because it's like disappointing your own cute little grandma.


     Of course, I made my husband watch the show. And other people. I have totally watched the full season like 3 or 4 times you guys. Hubs found it entertaining. He hated the puns but still enjoyed the show, which is a sign of a good show if he can put up with the bad puns. He was clever for Christmas and got me "Mary Berry's Baking Bible- over 250 classic recipes." It's adorable, and so British. He said that when he looked it up online, it got bad reviews because Americans were annoyed that the measurements were all metric. But when it comes to baking, let me tell you, it is amazing how consistent your results are when you measure on a scale instead of using measuring cups! You will need a small kitchen scale to make these cookies. Don't fear the scale!

     The only downside to these cookies was that I completely forgot to use self-rising flour. I pulled it out and put it on the counter, and then used regular flour for some reason that I can't even explain. I was angry at myself for it, but then the cookies tasted AMAZING and came out so well that I couldn't be mad anymore.  Don't tell Mary Berry.

     These cookies taste like chocolate fudge, but they have a chewy cookie consistency. Add in the extra chips ("buttons" as Mary Berry puts it!) and they are a scrumptious treat. We ate the whole batch in 2 minutes. Maybe a bit longer. But only because we left them at home while we were away a work. In all seriousness, they are, quite simply, delicious.


Mary Berry's Double Chocolate Cookies
from "Mary Berry's Baking Bible," page 201

Taken from Mary Berry: "Dead easy to make, these are wonderful cookies. Expect an irregular shape. They are very soft when they come out of the oven but will harden up considerably on cooling. This recipe makes about 36 cookies."

Ingredients:

200 g (7 oz) plain chocolate
50 g (2 oz) butter
397 g (14 oz) can of condensed milk
225 g (8 oz) self-rising flour
65 g (2.5 oz) milk or white chocolate buttons (I used milk chocolate chunks)

Method:

1. Lightly grease 3 baking trays (I used parchment paper). Break up the chocolate and gently melt it along with the butter in a bowl set over a pan of simmering water, stirring occasionally (I used a double boiler). Stir in the condensed milk and then take off the heat and cool.

2. Mix in the flour and the chocolate buttons and chill the mixture until firm enough to handle. Pre-heat the oven to 180 degrees Celsius (350 degrees Fahrenheit).

3. Place large teaspoonfuls of the mixture spaced well apart on the prepared baking tray. Bake in the pre-heated oven for about 15 minutes. The cookies should still look soft and will glisten. Don't overcook them as they soon become very hard. Carefully remove the cookies with a cookie spatula and cool on a wire rack.


Sunday, January 24, 2016

My Bullet Journal Set Up

     Close your eyes and remember the last time you got a new planner. Clean pages! Limitless possibility for the next year! I LOVE that feeling, and every time I got a planner at school I was one of those kids who highlighted important dates immediately, used it religiously to track assignments, write down funny quotes, and doodle during class. If you are a planner person, you know what I'm talking about.

     People say I am organized. My older brother visited and gawked at my kitchen, admiring the cabinet organization. My files at work are color coded, organized by date I need to review them, and ready to go at a moment's notice. My husband knows that things need to go in certain places and he will likely not have a hand in determining those places because I will organize things to a T. Or an L, if that's the way it needs to be. Efficiency is what makes organization work. Yet, somehow, on any given day, I am keeping up with the following:

  • Maybooks daily and monthly planner (contains both work and personal)
  • Work Google Calendar (shared with work people, for meetings and reminders of game duty)
  • Personal Google Calendar (shared with the hubs, he also has his own)
  • Meal planning calendar on the fridge (dry erase board)
  • Scraps of paper/post its for grocery lists
  • To-Do lists on Color Notes on my phone
  • Blank Blog posts with vague titles (where I put my ideas, so I don't forget them)
  • Sending my work email reminders from my personal email so I don't forget something important the next day. I'm so cool.

     Seriously? It's no wonder I forget things like people's birthdays (though I do have a birthday calendar for that), the day of the week, or even how to spell my own name. Actually, my work ID badge has my name spelled wrong and I didn't even notice until someone pointed it out last week. I've had that badge for 6 months...

     In the spirit of the New Year, I decided I need to put some efficiency in my organization. So I'm embarking on a Bullet Journaling system to help manage the chaos that is not only my schedule but also my brain. Remember the post about tabs? Yeah. Alllll the tabs.

I am using a Leuchtturm 1917 notebook and whatever pens I have laying around. I happen to have ordered some new Pilot G2 pens so those made it in my picture. I find, though, that if I get specific about only using certain pens in journals, then I journal less because they pens are not always around! 

     Bullet Journaling is system of organizing a notebook- any notebook- into a yearly/monthly/daily planner and reflection journal, all in one. Through a system of dots, dashes, circles, and habits, your notebook is efficiently organized into a calendar. Then, you use the rest of the pages as they come. You set up what you need to start and move on page by page, instead of being confined to a regular calendar and having blank pages at the end to use.


The left is how you set up the monthly view, and the right page is a "tracker"
where you can customize things you want to keep track of on a regular basis.


     I've gotten inspiration from these folks, who have all but convinced me that by Bullet Journaling, my handwriting and lettering will become impeccable.
I drew this in the front of my planner to fill a blank page


Boho Berry
This Marie Claire Article
Lifehacker Article

     My Bullet Journal will consolidate several of those bullets above and has already, in 4 days, helped me reorganize, recharge, and input some time for restorative journaling in my daily life! It's a wonderful creative mini-outlet. If you are a planner person, I totally encourage you to check out the links above- it may be for you! I'll update my blog with progress and tips when I've used it a little longer than 4 days. ;-)
Part of my goal with the Bullet Journal system is to have a daily option for creative outlet; part of that includes making mistakes! While I love that I can make my planner pretty, and I hope to continue making it look cute and inspiring, it's important to recognize that everything in there will not be pretty. Mistakes and messy writing WILL happen. For example, I tried to write a verse of the week for National Handwriting Day, and I didn't like how it looked. Instead of wasting space I just started over mid-page. Still looks nice!
For future planning, you add a "future log," or mini calendar. I have 6 months out because I liked how that fit on 2 pages nicely. It helps keep track of those things you don't have going on this month, but you don't need to count out pages ahead and start a new month this way. 


Bonus shark photo in my new light box, at my husband's request

Monday, January 18, 2016

Self-Paced Unit: 8th grade Volume

I'll set the scene: it's the 9th day back at school since Christmas. Students no longer have pencils, notebooks, homework- they're done trying to make a good impression (that was last week). They've got an insatiable desire to socialize, they somewhat remember what we've been learning, so the're a little confident that they don't need to pay attention very well (or, they DO remember what we've been learning and are more than ready to move on). When the students had left for the day, the three of us that teach 8th grade math just looked at each other, exhausted, shaking our heads. My co-teacher said, "Am I crazy to want our next unit to be a self-paced one?" She had just completed a self-paced unit on Pythagorean Theorum with her 7+ class, and had gotten really good feedback. She wanted to create some of that independence in learning for our students and give them time to focus on the learning, instead of on each other. 

But our classes are inclusion. My thoughts turned to thinking about individual students on my caseload, wondering if they'd be capable of managing a self-paced lesson. Several of our peers have had success with it, so why shouldn't we give it a try? 

In many ways, self-paced units are perfect for inclusion classes. Students can move at their own pace, meaning the high-flyers are able to move on instead of putting their heads down while someone else asks a question we answer with 3rd grade math. Others who need a little more time are allowed that time, without anyone knowing they're moving at a slower pace. Those who need 1:1 or small group instruction can get that, because I'm not large group instructing, and I have time to pull students, float around and answer individual questions, and there are two of us in the room doing so! Students keep track of their own scores on the check-ins, and thus learn a way to manage their own learning. It really is the perfect idea. We all agreed that the next unit, on Volume, would be a good one to schedule as self paced for these classes- it's short, mainly involves memorizing and using formulas, and we were confident that we could make it manageable for our lowest performing students, through both monitoring and organization.

The only real problem for us was that we were starting the next unit the NEXT day. 

So, I'm blogging today to show you (mostly you fellow teachers!) that no matter how little time you have to prepare, a self-paced unit isn't an overwhelming amount of work. Part of why we had not done one in our class yet was because we thought- "WHEW that's going to take a lot of work!" It does, but it doesn't have to take more work than you have time for. Here's what we put together, in just one afternoon! I don't have feedback yet about how it went because we are only on "day 2." I'll update that when we've finished the unit and moved on. BUT, I can say, by the end of the 1st day, some of our hardest working  (and successfully so) students were students with disabilities. It was a proud teacher moment to watch them succeed on their own! 

(Sorry for the potato quality pictures. My laptop didn't want to cooperate with editing. )


 UNIT OVERVIEW

My Co-teacher used this format in her other class. It simply lists, in student friendly language, the goals of the unit, the CC Standards, and the directions for the unit. To foster independence and allow us as teachers to focus on content questions, we refer all the instructions questions back to this page.
OUTLINE

Keeping things simple, and again using my co-teacher's formatting, we list the standards for each "day" of the unit, the pages they'll use in their interactive notebook, the lesson outline (aka what the students must complete), and what the assessment will be.

Highlights denote items they'll need paper copies for; links go to the videos, Google Docs, and pdfs they'll need for notes and instruction. Not only does the outline keep the student on track, but it helps with those DuFour questions we use in PLC's.


(Unit Outline page 2, so you can see not every lesson starts with a video)

SAMPLE ASSESSMENT

Since formulas are one of those "you get it or you don't" things in Math, we've used basic exit tickets for assessment. We also use the TenMarks lessons as an assessment to mix it up. TenMarks has a free component that is great! We used it last year, then petitioned for the accounts this year- which ended up being a district wide purchase based on our experience.
 STUDENT SCORESHEET

We created this as a half-sheet for students to put in their interactive notebooks. This way, they keep track of their grades. With her 7+ students, my co-teacher simply had them make a copy of the overview document and track their scores that way. With our inclusion students, we didn't want to deal with the hassle of copy/sharing, so we just gave them this. We check if they've mastered it after grading their assessment, and then they move on! If they have to move on but haven't mastered, we note their score in the score column and leave mastery blank, so they know to go back and try again later on. 

TIPS
Prioritize! 
Collaborate! 
Modify what you already have!
Share it with parents, including answer keys as appropriate!

Wednesday, December 30, 2015

Gradual and Non Traditional Resolutions

Source
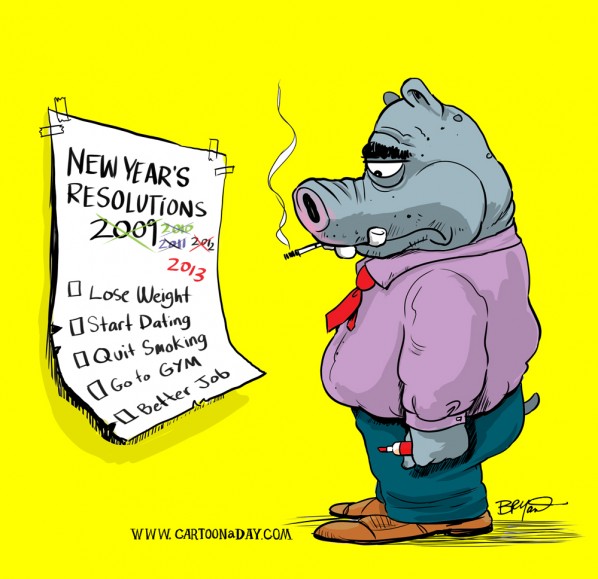
     2016 will be here soon! As in, 2 days from now I'll start forgetting the date and writing "2015" on the boards, only to be corrected by my students, which will amaze me, because they're SO observant about the date but not about the math we're learning?!? Blows my mind.
     When I sat down to write this post, I didn't really have a direction for the content. You might have heard the saying that being a teacher is like having "a web browser with a million different tabs open in your brain,"  and if you hadn't heard it, well now you have. That is how I felt sitting down to type this post. Some examples of my brain-tabs, because I love lists:

  • I'm planning on baking 5 weeks worth of baking challenges this week so I can say I finished my challenge "on time." 
  • I'm finally getting over congestion from colds/bronchitis/colds/allergies and ready to work out again, and I'm trying to come up with my schedule to get back into it. 
  • I am wondering HOW IN THE WORLD I will be able to wake up at 6am again next week for work.
  • "I really should write another blog post."
  • Many future plans were discussed with family over break- totally overwhelming at the moment.
  • Still planning New Year's Eve events for when my brother and his girlfriend get into town this week. Probably should get that figured out.
Source
      Brain-tabs like these are often the cause of our failure at new endeavors. For example, let's say your New Year's resolution is to eat healthier. Good for you! So, January 1st you get rid of all your junk food and you only buy the healthiest stuff at the grocery store. Your breakfast, lunch, and dinner over the weekend are super healthy, you're feeling great, and then you wake up late Monday morning. You have your brain-tabs going crazy because you need to get to work on time and when lunch rolls around, you finally remember you didn't pack anything. Maybe you skip it, or maybe you go out because you NEED to eat (understandable). When you get home, you're tired and just want something quick for dinner. Your brain-tabs are trying to load for quick, healthy dinner that fits your New Year's goal...but all it can come up with is "order pizza. The kids are hungry NOW." And within a week, you feel like you've failed your New Year's Resolution already. Planning to exercise more? Your brain-tabs will, no doubt, come up with many other things that you need to do before you exercise, and eventually, instead of exercising. Having worked at a gym in college, and seeing people try to just adopt a healthy lifestyle overnight, I've written reports on gym usage year after year that prove this to be true. Wanting to save more money? Unexpected expenses are just waiting around the corner and, in addition, your brain-tabs will come up with all kinds of things you need, want, or forgot about. It happens-and not just to you!

     I noticed this trend early on in life- people just don't keep New Year's resolutions. I do like the idea of having them, because resolutions are rooted in self-improvement. Establishing a mindset focused on self-improvement is a very healthy trend in which society should invest. So, instead of spurning resolutions, I decided in college to try what I call "gradual" resolutions.  I figured that maybe I could approach a resolution gradually, and surprise, it worked! I kept the resolution all year. I tried it again the next year, and it was a success again! Rather than recounting my successes, I'll leave you with a list of examples of gradual, and non-traditional resolutions. Happy start to 2016 everyone! 

Traditional Resolutions, made gradual: 
Source
--> If you want to EAT HEALTHIER, try having a healthy breakfast once a week, then twice a week, then three times a week...and so on. Once you're happy with your healthy breakfasts, try adding healthy dinner once a week, twice a week, etc. HELPFUL TIDBIT: Don't approach the meal plan change all at once or you will overload. Repeat recipes- have the same healthy meal once a week for a month. Then, your brain will remember the recipe, so that when you're rushed for time, you have a brain-tab to load that is a healthy option!
--> If you want to EXERCISE MORE, there are several ways to do this. New to exercise entirely? Resolve to try a new form of exercise once a week, to see what you like. Then resolve to do it with increasing frequency. Need to get back in the habit? Resolve to workout with increasing frequency, and then add in resolutions to bring a buddy, find a new place to run, set a goal (time, weight lifted, distance) and resolve to meet it. HELPFUL TIDBIT: Make a plan and post it on your fridge, so others can hold you accountable or find a Facebook or social media group to keep you accountable. Whatever you do, don't ask my husband to text you and say "get off your butt, fatty," because he WILL do it. 
--> If you want to SAVE MONEY, make it gradual by saving a little a week, cutting out part of an expense, or learning a budget software at first. HELPFUL TIDBIT: Give yourself TIME to adjust. We started using a budget software last February, and it took us 3 months to truly feel comfortable using it, and that didn't involve any saving! While it was frustrating, since then, we've been able to save for several specific things, and that has felt great! Saving money takes time and long-term commitment.
--> If you want to make an INTERNAL CHANGE (being more positive, for example), you've got to surround yourself with the mindset before you can adopt it. Find some good books or blogs you feel are positive, are about having a positive outlook, or are even self-help books to guide thinking. Reading is an important part of an internal change. Then, find little ways to implement what you've read. Pay it forward at a restaurant or coffee shop, start a daily positive reflection on Twitter or other social media, or even in the privacy of a journal. Put positive post-it notes on your mirror for daily affirmations. Find YouTube channels devoted to giving daily positive affirmations. There is a lot out there!

Source
Non-Traditional Resolutions: 
~ Resolve to take better care of your skin; research your skin type and try different face washes to see which ones work best. There is quite a bit of research to read on the subject! Sally beauty Supply has great products, often cheaper, to try out. This includes finding a good sunscreen!
~ Resolve to give whenever you get. Birthday coming up and you've asked for electronics? Donate some of your old ones (research online where to donate different items). Shopping spree and you've bought  a lot of clothes? Clean our your closet and donate to friends or family in need, or to thrift stores. 
~ Resolve to question media and fact check. Find out which sources are reliable and which are not. If you hear something on the radio, don't take it as gospel because you heard it from your favorite morning show host- check it out in other sources to see if it holds up. 
~ Resolve to learn a new skill. Did you know there are websites, YouTube channels, blogs, and all sorts of free resources on the internet to help you learn just about ANY skill? People make a living providing online resources for learning, and you can benefit from them- for free! Want to learn a new instrument? Try your hand at Calculus again? Learn the art of photography (not just Instagram), cooking ridiculous foods, writing poetry, or travel trivia!
~ Resolve to be more thankful. Start by buying a bunch of Thank you notes from Target's dollar spot. Keep them in a place you spend a lot of time (by the couch, in the kitchen, etc.) to help you remember to use them. Make a list of people's addresses and print it out to post somewhere easy to find in your house. USE THEM. Ultimately, some part of a resolution involves YOU doing something YOU want to keep doing!


CHEESY REFLECTIONS
I'm glad I finally started a blog this year! I had thought about it quite a bit, but wasn't sure I could make the time commitment. The first 3 years of teaching really are a bit of a mess, especially in terms of managing time to give yourself actual personal time. I know the blog title is a bit unorthodox but I truly believe it fits my plans for this little space in the internet. I've realized my writing is CRAP. I used to write so much, both for school and personally, and I've totally lost touch with my writing style. Writing at work is either on an average 5th (or lower) grade level, so ALL students understand, or it's writing legal documents (IEPs), both of which  leave zero room for practicing creative pursuits. I have a few followers and I plan to pick up the pace with posts, projects, and followers in 2016. Cheers!


Sunday, December 6, 2015

A Crafty Christmas: Kids' Felt Christmas Tree (no-sew!)

     This was such a fun project! I saw the idea on Pinterest, looking at different DIY Christmas decorations, and immediately I thought, "I have to make this!" This felt tree has felt decorations that stick to the tree, so that it can be decorated and re-decorated throughout the holiday season. It is perfect for little kiddos who want to mess with the real tree decorations, which may or may not be something you want them to do. 


Now, I do not have any children. And despite the fact that my husband and I act like children half the time (examples: please note in these photos the Ikea "kids' track start line" rug which this crafting took place upon), I could not justify making this to put up in my own house. However! I am a teacher and therefore work with many people who have young'n of their own. My co-teacher and I got to work one afternoon making the trees and ornaments for our other co-workers. We gifted them just before our Thanksgiving break so that their cuties could decorate their own tree to start the holiday season! 

Photos


LEFT: The finished project, up on the wall and decorated 


RIGHT: A few ornaments. Some were plain cut outs (we used cookie cutters - heart, circle, bell, stars- to create patterns to cut out) 

  LEFT: We sewed glittery Christmas colored pom-poms on some of the ornaments. You could also sew on riff-raff (the zig-zag ribbon), ribbon, or other felt shapes if you wish. I recommend sewing instead of gluing, especially with the pom-poms, because those could be swallowed if they fall off!


RIGHT: Some glitter glue was fun for making the ornaments sparkle, and add personality. 


LEFT: The star atop the tree! 


RIGHT: How I hung the tree on the wall in a secure fashion that was also removable when Christmas is over. See the description below of how I used velcro and command strips to make sure the tree stays up!


Products
(for 1 tree)

~ 1/2 yard green felt (use the weekly coupon at a store like Joann's to save a bit on this!)
~ 1 package multi-colored felt
~ glitter glue (red, silver, gold)
~ command velcro strips (refill pack)
~ needle and thread, if attaching pom-poms or other decoration
~ hot glue and glue gun
~ newspaper or old cardboard (to put things on when you're spraying them with adhesive)

Process

1. Cut out the tree first. This way you know how to size your ornaments afterwards!
     Pro Tip:  Fold your fabric in half, and draw a tree outline on the fold. I did this by hand without a template, but you could search for a template to use if you needed one! Cut out the outline and open it up- voila! A tree!

2. Cut out a trunk for your tree from brown felt. I used the fold method again, so it would be symmetrical. But you don't have to be that attentive to detail...

3. Attach the trunk to the tree with hot glue and let it cool. 

4. Make your ornaments! Cut out various shapes in different colors, then decorate them with felt cut-outs and hot glue, pom-poms, or glitter glue! This is the fun part. Here is also where I sewed on the pom-poms. 

5. When your glitter glue is dry and you are waiting impatiently to be able to practice decorating, find some newspaper, old cardboard, or a concrete patio outside (but NOT on a windy day). Lay your ornaments pretty side downward on the work surface, and follow the directions on your spray adhesive for a "temporary adhesive." For mine, this meant spraying from a distances of 10 inches away and letting it dry completely before moving it. 

6. Spray the backs of the soft sided velcro squares and attach them to your tree. 
     Pro Tip: Place these at the top of the tree and then on the edges of the branches so the branches don't droop in once you place ornaments on them.

7. Once they are completely dry, place the command strips on the velcro squares so they attach, and then place the whole thing on your wall. Now you have a tree that will be easily removed when you want it to be (just peel it off of the command strips) and take the command strips off the wall. 


Sunday, November 29, 2015

A Crafty Christmas: Decorative Letters

Decorating is on fleek! I'm pretty sure I used that phrase correctly. Right? I'm a middle school teacher, I don't actually know I just pretend I do. Regardless, decorating is the "in" thing to do now. Gone are the days where you have to own a large, swanky house in order to show off your home decor. The rise in popularity of blogs like Shabby Chic, discount stores like TJ MAXX and Marshall's, and countless shows on HGTV have finally gotten through to the public- "You, too, can have a beautiful place to live, no matter where that place is or it's size!"

One easy craft (even for kiddos!) to add some trendy pizzazz to any space are decorative letters. I'm making a few of these to give as gifts this Christmas, and personalizing the colors and accessories to fit the recipient.

Photos


Products
 
~ 3-D craft letters (this is a far less complicated craft if you use 2-D letters!)
~ colorful yarn or thick string
~ beads, buttons, jewels, or other adornments (check the button aisle)
~ matching felt (if using 2D letters, you probably don't need this!)
~ Hot glue gun

I purchased all of my supplies at Michael's and used a 40% off coupon, so the total cost was under $10 per letter. I got my hot glue gun a long time ago at JoAnn Fabrics; they have these low heat mini glue guns which cost $2.99 and the accompanying pack of gluesticks (~$5) has lasted me a few years! Definitely a bargain if you do not have a glue gun.


Process

1. Warm up the hot glue gun. Don't start until it is good and ready! Have more glue sticks on hand for easy resupply.

2. Start by wrapping the yarn around the letter; secure the end of the string with hot glue and let it cool before wrapping any more.
                 Pro tip: Designate one side to be the "back" and one the "front" of the letter; make sure the front is clean of any overlapping yarn or see-through spots where hot glue peeks through. If you stop to change yarns, for example, or if you're using a 3-D letter and have to stop to wrap around a different part of the letter (the middle of the A, in my case), you'll need a side where you can start and stop the yarn by gluing and it will look a little patchy. See below.

Front: All lines are pretty straight! No hot glue in sight!
Back: Note there are some wonky overlaps and
see-through spots. 


3. Wrap as tightly as you can. As you wrap, push up the already-wrapped yarn to make it a little tighter. This will prevent any see-through spots. As you go along, on the designated "back," put some hot glue every few rows of yarn, to keep it secure in case you need to stop and use the bathroom, rescue a pet or baby from eating something they shouldn't, or click "play next" on Netflix. Totally plausible situations there.
                 Pro tip: I found it helpful to make "strips" of hot glue on which to place the yarn, instead of blobs. I'd place the glue gun on the letter and drag it, so it left a strip of hot glue behind. Also, wait until your hot glue has cooled before continuing to wrap. No one likes burned fingers or hot glue tattoos.

There's a LOT of hot glue behind
that button, so I wrapped it in
felt and secured the felt with
 hot glue.
4. When you've finished wrapping, secure the end with more dots of hot glue. If you're using a 3-D letter, cut felt to fit any bottom/top spots, unless you want to get crazy and try to wrap that with yarn as well. Hot glue the felt in the center first, and then around the edges after you place it so that the felt strips are very secure.

5. Add something to either hang or rest the letter upon. No one likes a gift they have to do work in order to display! Give your giftee a way to hang it, if it's meant to be hung, or give it a little resting perch (dowel rod, for example) if it's meant to rest atop furniture or on a mantle. I cut a strip of felt and looped it, then glued it on the back of the letter so it can be easily hung.

5. Add your adornments and decorations. Make sure they are secure with the hot glue, gluing in multiple rounds if needed (let each round cool before continuing). If it sticks out from the letter, wrap some matching felt around it and secure it so that you don't see a pile of hot glue under the button (or whatever) or to help it stay in place. (See buttons secured with glue and felt to the right and below)

I placed this button on the side, and wrapped the edges like a rose
in order to hide the absolute mound of hot glue holding it to the side
of this 3D letter. Looks so much prettier now!


That's all! These are very simple, super easy to personalize, and this whole process took me maybe one episode of the West Wing. Possibly longer because I stopped to make popcorn, but that time doesn't really count against me. The point really is, under an hour to make this cute little letter!


Happy crafting!