Showing posts with label baking. Show all posts

Friday, October 21, 2016

Pumpkin Muffins with Walnuts, in our new place!

      Hello hello again! It was so hard to be away from the blog for so long, especially since there's so much I've been exploring and wanting to share. Long story short, I occasionally have the worst luck in the world, which I like to think of as a bad luck waterfall downward spiral up a creek without a paddle sort of event. I'm not always this unlucky, but when it hits, the luck is BAD. This time my bad luck manifested in my ability to be in touch with the world. Between my cell phone and connecting to the internet, I've experienced enough "Well it should be working, wonder why it's not..." moments in the last six weeks to last me...a long time.

      I've done so much exploring, reading, watching Gilmore Girls, and frugally shopping for dishes, kitchen utensils, and furniture in the last few weeks. At first it was really fun, like living the best version of life, but after a few weeks it's gotten hard to handle! Starting anything anew is always exciting at first, but the excitement has faded a bit as I've started to get accustomed to our new home and this big city, and realized...I need something to do with my time!

      Taking a break from job hunting, I decided I'd work on a few blog posts today. And of course, I've started with the most delicious one! It's turned to fall here so quickly! These cold, cloudy days are just begging for all the fall comforts, including everything pumpkin.

      I have a long history of a tumultuous relationship with breakfast. For most of the past five years or so, I've struggled to want to eat breakfast. Don't get me wrong, I love breakfast food! I just seem to prefer it, well, mostly for dinner, ha! My stomach seems to strongly dislike waking up. This has been problematic, specifically for functioning at work, eating before running events I'd signed up for (pretty much ruined a 10 mile race for me), visiting people and going out to eat for breakfast, and generally it's just never a good thing. Over the years, with my gastroenterologist, we've figured out a routine that helps and a few of the reasons why, which maybe I'll get into another time, but one of the strategies I use to entice my stomach in the mornings is by baking whatever I'm craving in muffin form.
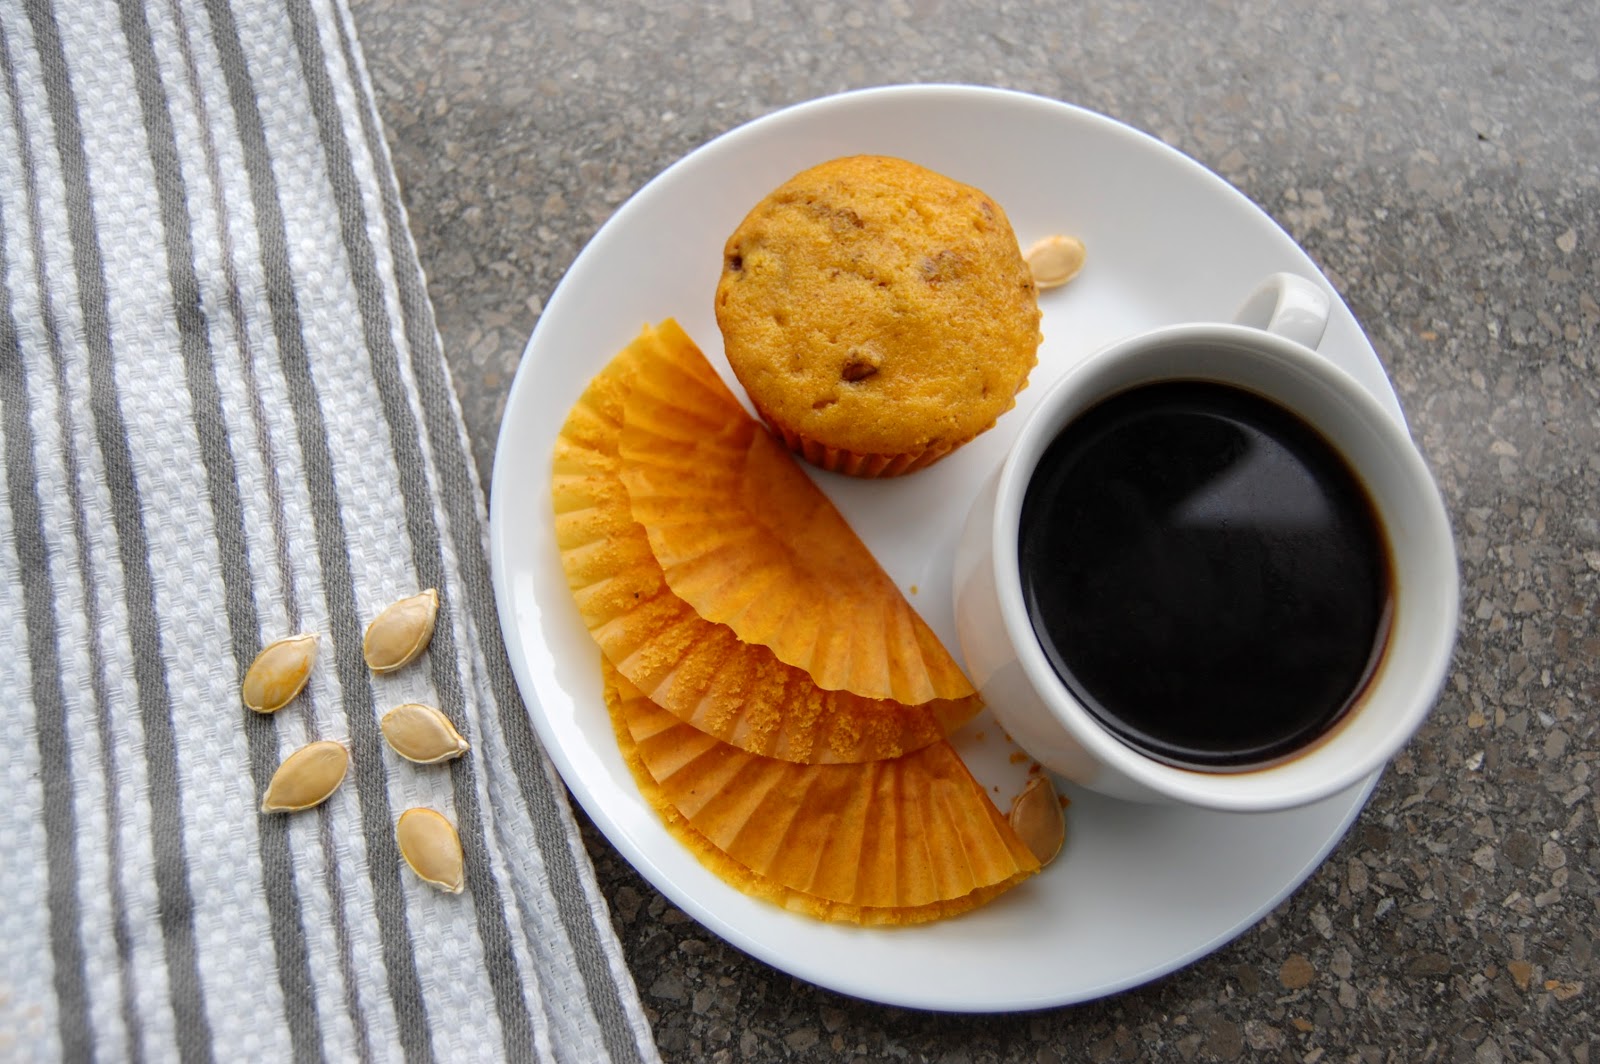

      This brings us to pumpkin muffins! With the stress of moving, even when I haven't felt stressed about it, my gut has reverted to it's old ways and I've just not been into breakfast here. It's meant I get late starts to the day and feel like I'm missing out on time I should be using more productively. So, since I'm craving all things fall, I made these wonderfully simple pumpkin muffins from a German blog called "Esspirationen" which translates, essentially, into "eat-spiration" and which I think is beyond adorable. I'll leave a translated version below, but feel free to use your web browser to translate the page from Germany.

      I had to make these little darlings in my new toaster convection oven, because this is my life now.  My kitchen situation, as compared to previous living arrangements, is quite sparse, and I've just got the basics. For example, aside from only having a small convection oven, I mixed everything by hand because I don't yet have a mixer! And I don't have great counters for baking prep, so until we get a table I'm confined to tiny counter spaces which I promptly make a huge mess. At least they are delicious!

Thanks for tuning in, and look for more posts soon, I've so much to share from my "offline" time! 

Pumpkin Muffins with Walnuts and White Chocolate
Translated from Esspirationen
*I omitted chocolate from mine- I KNOW crazy- but that's the way it was! I encourage you to follow the original recipe for yours :)

Ingredients for 12 muffins
200 g Hokkaido pumpkin
150 g spelled flour Type 630
2 teaspoons baking powder
2 eggs
100g sugar
1 packet Bourbon vanilla sugar
75 g butter or margarine
1 pinch of salt
50 g walnuts
100 g white chocolate
1 pinch of gingerbread spices

Preparation 
Cook the Hokkaido pumpkin throughout for 15 minutes in a large pot in plenty of water. Then remove and let cool slightly. Roast the walnuts in a dry frying pan and chop. Chop chocolate (up to 2 ribs) coarsely too. Cut out 200 g of pumpkin flesh and puree. Preheat the oven to 200 ° C (top / bottom heat). Beat butter and sugar until creamy, then add eggs and a pinch of salt and beat for 2 minutes. Mix flour with spices and baking powder and stir. Add to butter and sugar mix and stir, then add the pumpkin puree. Stir in chopped nuts and chocolate. Prep a muffin tin and spread the batter evenly in it. Bake 20 minutes. In the meantime, the remaining chocolate ribs melt in a small bowl in a water bath. Leave the finished baked muffins to cool slightly in the mold, then release them from the mold and decorate with the melted chocolate and powdered sugar.

Sunday, May 22, 2016

Spring Updates!

       I've got some crazy news! 
But first, hello internet world, it's been a while. 

I wish this had been a lucky jersey because a lucky
jersey might have helped the Caps get past the
second round of the playoffs. Ughhhhh. 
      A long while, actually. I apologize for my absence! It's been a busy spring so far. However I am armed with some extra time in my schedule, some new ideas, and a whole lot to update on in a quick update post! I have spent quite a bit of time the last few months doing what I usually do every spring, panicking over the end of the hockey season and then slowly killing my nerves by watching my team in the playoffs. I am a Washington Capitals fan through and through and EVERY SEASON they just screw me over in the playoffs with their lack of playing as well as they should. Sigh. Of course the games are 3 hours plus overtime, and of course there is one every 2-3 days, so I lost both sleep and time to get things done. Laundry piles up, social obligations fall to the side, and all I wear is my giant hockey jerseys and leggings. It's a rough time. And, like they do every year, the Caps fell in the second round again this year to our biggest rivals, the Pittsburgh Penguins. Life is so rough. So, so very rough.

      Work has been super busy- wrapping up my caseload management responsibilities, getting test-prep planned, getting through test prep, and then on top of it all supporting coworkers in all of their personal endeavors. Half marathons, babies, buying houses, babies, weddings, and mostly people having babies. I love that I work at a school where there is a huge culture of both teamwork and shared celebration. We love to support each other through all of life's journeys, not just the ones we are on in our classrooms. I've done a bit of baking for these celebrations- a bouquet of cupcakes for a "bride wars" themed bridal shower, cute little cupcakes for a baby shower, and this sprinkled beauty, which admittedly was a severely huge amount of cake, for another baby shower. We've got another one coming up in a few weeks, and for that there may be some cookie pictures on my Instagram page.

      My husband and I have traveled quite a bit, too! We visited friends in San Antonio for spring break, went to a wedding in Atlanta, and....for the big news....we went to Munich, Germany for a few days in March! Aside from our honeymoon in Jamaica, this was my first big international trip and it was quite a trip! From the long flight over to exploring a new city on my own for 2 days (hubs was doing work related things), it was both fulfilling and exhausting. The even crazier news is that we are MOVING to Munich in September! Hubs will be working there for 1.5-2 years in a post-doc position. Holy moly! He applied several months ago as it was his "long shot" scenario, and after  months of him waiting to hear back, then getting invited for a visit, then him giving a talk on our visit and then more months of waiting to hear back after our visit, we finally know for sure we are headed across the pond in a few months. This beautiful city pictured below will be our new home!


I took this picture from the top of St. Peter's church in Munich, right across from the Marienplatz (tall tower on the right)
and Frauenkirche (tall church on the left) on my first day in the city. 

      I've got so many posts I have wanted to post but haven't for professional reasons; look forward to additional posts about traveling, moving, and managing all of life's daily requirements in between the moving and traveling posts! I'll still be baking, running (if I ever recover from a sprained ankle that is nagging me), teaching, bullet journaling, and I'll definitely be back to the blogging on a more regular basis.

Wednesday, February 24, 2016

Hot Buttered Rum Cupcakes

     It snowed recently. We got a whole 4 inches! Of course, in North Carolina that's what happens when a blizzard rolls through. That, and closure of pretty much every school, business, and backroad for a few days. We couldn't even leave our parking lot for 3 days after 4 inches of  snow.


       I spent some of that snow day time whipping up a a batch of these Hot Buttered Rum Cupcakes. The recipe came from the "Prohibition Bakery" cookbook I got for Christmas from my brother. The book is full of mixed drink recipes converted into lovely, scrumptious, boozy cupcakes. It was brutally cold those snowy days and when reading through the recipes, this one stood out as warm and cozy. If you've ever had a Hot Buttered Rum drink on a cold, winter evening...well, you know that these appeared to be the perfect baking plan for a snowy winter day.


      My official review of these cupcakes would fall somewhere in between perfect-warm-from-the-oven and TOO-sweet-to-just-grab-and-eat. Hot Buttered Rum as a warm drink is generally sweet, but the combination of sweet vanilla cupcake, caramel filling, and sweet rum flavored frosting was a bit of a sucrose overload. The cupcakes were perfectly fluffy, the frosting beautifully smooth, and the caramel was delicious. I made these as full sized cupcakes because I only had regular cupcake liners, but maybe there was a reason they  made these (and every recipe in the book) in miniature! I'll have to test out another recipe and let you know..

     The directions were multitudinous. As I was typing this post I had a deja-vu moment back to when I was baking the cupcakes and felt overwhelmed by the directions. They took quite a while from start to finish! I think there could be a simpler way to make these, but I haven't experimented with that yet. Additionally, you WILL use ALL of your pots, pans, and measuring utensils (and probably your stash of butter in the fridge too) making these. All of them. Ask my husband. I did so many dishes during those snow days, that it's put me off from baking since (well, not true, but it did put me off baking for a day or two).

I believe that this picture substantiates that I overcooked my caramel just a bit. But it was amazing to eat when warmed up!


Hot Buttered Rum Cupcakes
taken From "Prohibition Bakery" page 101
by Leslie Feinberg and Brooke Siem

Ingredients:

Filling 
1 cup sugar
4 tablespoons (2 oz) butter
1/2 cup heavy cream
1 pinch salt
1/4 cup dark rum
                                                                                   Frosting
Cake                                                                          1 pound powdered sugar
1 egg                                                                          1 stick butter
1/3 cup sour cream                                                    1/3 cup dark rum
1 and 1/3 cups all purpose flour
1 cup sugar
3/4 teaspoon baking soda
1/2 teaspoon cinnamon
1/2 teaspoon nutmeg
1/2 teaspoon salt
1/2 cup water
1 stick unsalted butter

Preparation: 

Filling  (My input- up to a day ahead of making the cupcakes, prepare the filling using the following instructions)
1. In a saucepan, heat sugar and butter over medium heat until butter is melted and the mixture appears smooth (not grainy). After a few minutes, the mixture will bubble and turn a nice golden color.
2. While the sugar and butter mixture is melting, warm cream over low heat, taking care not to boil it.
3. When the sugar is fully dissolved in the sugar/butter mixture, slowly stream in the warm cream, stirring constantly.
4. Add a pinch of salt and stir thoroughly
5. Once everything is fully mixed, slowly pour in the rum, stirring constantly until the mixture is smooth and even in color.
6. The caramel will appear thin when hot but will thicken significantly when cooled.
7. Transfer the caramel to a squeeze bottle and let it cool before filling cupcakes.

Frosting (My input- make the brown butter for the frosting (steps 1-5) up to a day ahead of time, but at least 2-3 hours ahead of time, to allow the butter to set again before mixing frosting) 
1. Heat butter in saucepan over low heat until it is fully melted.
2. Turn the heat up to medium high, keeping a close eye on the butter. Stir constantly, taking care to scrape the bottom of the pan.
3. Remove the pan from the heat once the butter begins to take on an amber color and smell faintly nutty, and little flecks of browned butter are visible. Keep a close watch over your butter at this point. The difference between browned butter and burnt butter is a matter of seconds.
4. Transfer butter to a heat proof container, taking care to scrape every last fleck of browned goodness out of the pan.
5. Cool in the refrigerator.
6. Allow browned butter to soften again, then combine with confectioners sugar in a standing mixer on low speed.
7. Slowly add dark rum and beat until fluffy.
8. Transfer the frosting to a piping bag.

Cupcakes
1. Preheat the oven to 325 degrees. Line mini cupcake tins with paper liners.
2. In the bowl of an electric mixer, beat egg and sour cream. Set aside. (I just left mine in the stand until step 5) 
3. In another bowl, combine flour, sugar, baking soda, cinnamon, nutmeg, and salt. Set aside.
4. Combine water and butter in a saucepan and heat until the butter melts.
5. Remove from heat. With the mixer on low speed, slowly pour the hot water/butter mixture into the mixing bowl containing the egg/sour cream mixture. Beat until incorporated.
6. Slowly add the dry ingredients to the wet ingredients and beat until incorporated.
7. Fill cupcake tins 2/3 full.
8. Bake for 10 minutes. Let cupcakes cook completely on a wire rack before filling or frosting.

Assembly
1. When the cupcakes are cool, core the cupcakes with a narrow bladed knife.
2. Fill each cupcake with the rummy caramel, taking care not to let it overflow.
3. Frost to your liking. (I piped using a large round tip)
4. Garnish with a sprinkle of brown sugar, if desired (I did not!)

Sunday, January 31, 2016

Double Chocolate Cookies

Source: Buzzfeed
     Back in October I had a BAD case of Bronchitis. I was home sick for a week, and needed something to do to keep myself "resting" on the couch. I perused Neflix for an addicting new show, and lo and behold, found a winner. It's called "The Great British Baking Show." I think now it's just called the Great British Bake Off, but on Netflix the first season had a different name.


     Anyway, I plowed through the series in two days. It was so interesting! The challenges were unique and complicated, the mix of personalities between the competitors was engaging to watch, and the judging was fair. I especially like how they are able to practice two of their recipes beforehand, but the third one is a complete surprise with vague directions. Plus, you know, cute little background video of baby goats, bad (BAD) puns by the hosts, and all the drama of "Will it cook in time? Is it going to be too dry? Those look horrible, I bet he/she gets sent home" makes it worthwhile to watch.

     In case you weren't convinced you need to go watch this show now, I'll mention that one of the judges is named Mary Berry. I kid you not, that is her name! I even looked her up to see if she'd changed her name to match her baking profession, but didn't find anything conclusive. I'll keep looking. She is a cute little grandma you want to keep in your pocket, but then you're afraid she'll tell you that your cooking is too dry or not evenly baked. And you don't want to disappoint Mary Berry because it's like disappointing your own cute little grandma.


     Of course, I made my husband watch the show. And other people. I have totally watched the full season like 3 or 4 times you guys. Hubs found it entertaining. He hated the puns but still enjoyed the show, which is a sign of a good show if he can put up with the bad puns. He was clever for Christmas and got me "Mary Berry's Baking Bible- over 250 classic recipes." It's adorable, and so British. He said that when he looked it up online, it got bad reviews because Americans were annoyed that the measurements were all metric. But when it comes to baking, let me tell you, it is amazing how consistent your results are when you measure on a scale instead of using measuring cups! You will need a small kitchen scale to make these cookies. Don't fear the scale!

     The only downside to these cookies was that I completely forgot to use self-rising flour. I pulled it out and put it on the counter, and then used regular flour for some reason that I can't even explain. I was angry at myself for it, but then the cookies tasted AMAZING and came out so well that I couldn't be mad anymore.  Don't tell Mary Berry.

     These cookies taste like chocolate fudge, but they have a chewy cookie consistency. Add in the extra chips ("buttons" as Mary Berry puts it!) and they are a scrumptious treat. We ate the whole batch in 2 minutes. Maybe a bit longer. But only because we left them at home while we were away a work. In all seriousness, they are, quite simply, delicious.


Mary Berry's Double Chocolate Cookies
from "Mary Berry's Baking Bible," page 201

Taken from Mary Berry: "Dead easy to make, these are wonderful cookies. Expect an irregular shape. They are very soft when they come out of the oven but will harden up considerably on cooling. This recipe makes about 36 cookies."

Ingredients:

200 g (7 oz) plain chocolate
50 g (2 oz) butter
397 g (14 oz) can of condensed milk
225 g (8 oz) self-rising flour
65 g (2.5 oz) milk or white chocolate buttons (I used milk chocolate chunks)

Method:

1. Lightly grease 3 baking trays (I used parchment paper). Break up the chocolate and gently melt it along with the butter in a bowl set over a pan of simmering water, stirring occasionally (I used a double boiler). Stir in the condensed milk and then take off the heat and cool.

2. Mix in the flour and the chocolate buttons and chill the mixture until firm enough to handle. Pre-heat the oven to 180 degrees Celsius (350 degrees Fahrenheit).

3. Place large teaspoonfuls of the mixture spaced well apart on the prepared baking tray. Bake in the pre-heated oven for about 15 minutes. The cookies should still look soft and will glisten. Don't overcook them as they soon become very hard. Carefully remove the cookies with a cookie spatula and cool on a wire rack.


Monday, September 7, 2015

Indian Inspiration


The "India" challenge on my baking list was one I was really looking forward to completing. I think that Indian recipes are often so much simpler than what I often cook or bake. I love the aromatic spices of Indian culture and the flavors they produce! Another great attribute of Indian recipes is that they are often nearly-vegan to start with, so if you are adapting a recipe to fit certain food specifications (allergies, dietary needs), it's simple enough to find a recipe that will easily fit your needs.


These cookies I made, for example. They are called Nan Khatai cookies and I used the recipe found on Blend With Spices. The directions were clear and simple. The ingredients were few and readily available- the only catch was the Cardamom. I don't use cardamom often, so when I went to the store and saw that the tiny 3 ounce container was $15 I went on a mini rant to my husband in the middle of the baking aisle. He just looked at me like "uhh....." which is understandable. It's probably the same look I gave these two college girls once when they stopped me in the same baking aisle and asked me if they could just melt butterscotch chips and use it as salted caramel. Uhhhh....


My little jar of Cardamom
What I ended up doing was going to the local Co-op grocery store, where you can buy many herbs, spices, and baking needs (cocoa powder, etc.) by the ounce. They have containers or you can bring your own. They also have these little plastic bags you can use and twist tie closed, which is what I used, and which makes you feel super sketchy when you go into the store to by an ounce of cardamom which looks like some other substance, and then you leave the store just carrying around your little bag of "ground spices." Sketchtastic. Worth it, though, to only pay 92 cents for cardamom, instead of $15.

Step 1: Mix dry ingredients. Step 2: Add wet ingredients
Step 3: Drop onto cookie sheet


Anyways, these cookies have a basic recipe with few ingredients. No refrigerating the dough, no extra steps needed- just mix, bake, and done. They tasted delicious! I might use less cardamom next time, because I found the taste to be a bit overpowering. However, the almonds on top help to smooth out the taste of the cardamom, so don't skip on the nuts if you make these!


I thought I'd blog the process of these cookies, you know, step by step style. I realized as I was uploading pictures that I took really boring and non-descriptive photos of the process. I also realized I need to edit the lighting in the photos because my kitchen has this one horrible fluorescent tube light and everything in the kitchen- cabinets, appliances, counters- are an off white color, so there is little natural looking light. When I take photos without flash, they come out a little dull. I could definitely have edited these photos and skipped this whole paragraph explaining myself, but I'd rather get the post up! I'm sure I'll regret that later...Enjoy for now!

And, voila! Cookies. 


Tuesday, June 2, 2015

A Series of Lists

      I completely blame hockey playoffs!! The Caps made it to the end of the 2nd round and that meant every other day for a month I was watching a hockey game in my spare (ha) time. Making it to the 3rd round would have been history in the making and I wanted to be along for every minute of every game.

Things that suffered on account of time spent hockey during the playoffs: 
Hockey memes are okay [source]
- keeping up with baking challenges
- grading student papers
- social relationships
- level of house cleanliness
- any and all exercise
- maybe personal hygiene (but only on the weekends...)


     I also blame the end of the school year! We've got 2 weeks left until summer break. So much to do, so little time. Last week I was at school every day until 6 or 6:30, which means I'm fried when I get home. Any blog post I'd have written would have been utter gibberish last week. And the week before. Come to think of it, this might also be gibberish...
Teacher memes are great  [source]


Things that continue to suffer because it's the end of the school year:
- keeping up with baking challenges
- social relationships
- level of house cleanliness
- most exercise
- maybe personal hygiene (but only on the weekends...)


I'm keeping this short:
- in the hopes that I write another one soon
- to try and reclaim some sort of exercise regimen (I'm supposed to meet people to play soccer in 40 minutes)
- to build suspense...


Here are some posts I hope to write about in the upcoming weeks: 
- I'm competing in a local baking competition for a brewery! It's really nothing major, just for fun, but I'm fairly competitive so I'm obviously playing to win (the keg)
- My summer job is pretty cool, and I'm being trained in something new this year so I hope to describe that a bit
- I need to do some painting this summer and want to share those
- Summer adventures in general!!
- I WILL finish that d%&$ t-shirt quilt I've been working on for 2 years now (actually). I plan to share my process as a moderate sewer who tried to get way too fancy, and how it all turns out


      Stay tuned! I promise I won't be so delinquent now that hockey playoffs are over.

Tuesday, April 28, 2015

One Month Later...

Whelp. I knew it would happen. This is why I have never really been a "blogger!" Life gets in the way people!

Top 10 things that have contributed to the large gap between posts: 
1. Work. Last week I was at school every day until 6:30 or 7. Possibly the week before as well. Ew. Gross. Ugh. 
2. HOCKEY PLAYOFFS. I'm a bit of a fanatic. Let's go Caps!! (obligatory #CAPSLOCK @washcaps)
3. Our outdoor soccer league is finally getting to regular schedule (rain kept us from playing the first several weeks)
4. Weekends away/with visitors. Springtime apparently = ALL the visits. 
5. More work. Writing IEPs, doing transition meetings, lesson planning...not enough time in the day!
6. Procrastination
7. Third Rock from the Sun is on Netflix! Game of Thrones is back!
8. We decided we are going to move this summer! Which led to apartment hunting and.. 
9. Cleaning out closets/stuff around the house (still need to work on this)
10. Warmer weather has meant we've been outside a lot more! At the outdoor bars, taking a walk, grilling dinner, etc. 

I started to try and type an actual post but all of those things in the above list (particularly #1 and #5) have made me what we (in college) call "cracked out." I'm so tired but I'm giddy but mostly tired but also not in a bad mood just really really really REALLY in need of bedtime happening soon. And I don't write as well. But it's more entertaining, from what I hear.

So, to make it up to you, here's some lovely pictures to show what I've been up to: 


--> Going to Williamsburg, VA to visit the ol' collegiate stomping grounds/spend time with friends who are moving halfway across the country in a few weeks. We had an enjoyable time wandering campus on my spring break, and pointing and laughing at the students who had classes/exams. We didn't actually do that. We just talked about doing that.

 <--  Enjoying the pleasant spring (less so enjoying the pollen that accumulates everywhere) by taking some walks and hanging out on the back patio*.

*This is actually not from my back patio.


 <-- Baking lots of things for Easter and in general. Easter was entertaining because I got my cousins to show my mom how to video chat me, and she took pictures of me (on her computer) video chatting with them, on her camera.

--> Spending time with friends on nice evenings! This is a picture of one of the games at our favorite local hangout. We call it "Barcade" because we never remember the real name. They have a bunch of old school video games and you can play any of them for 25 cents. It definitely brings back old memories!


 <-- My Easter Peep wreath from my grandma. She made this for me one year as a Christmas gift, and it is awesome! She also got me the peep basket and cover. Last week, my mom gave me some greeting cards and the front is a peep with the phrase "Inside, we're all the same." Can you tell my family likes Peeps? It's actually part of an Easter tradition I started where we roast the peeps like marshmallows.


DONUTS. DONUTS. I MADE THESE. TASTE SO GOOD. DONUTS.


Okay I think we need to end there today. I have some interesting baking challenges coming up and a few pre-summer crafts/activities I want to accomplish. Which means I'll be rearin' to go with material and clearly should not take another month to post. Clearly. Obviously. (Donuts?)


Saturday, March 28, 2015

Feeling Springy

     The weather has finally gotten less "abominable snowman" and more "typical spring." We have had so much rain...thank goodness the temperature warmed up or we'd be in school until August! Living in a place where there is no plan for snow days and no good way to make roads safe when it does snow has been frustrating. I'm used to living in a place where it's not a state of emergency when you get a couple inches of snow, and I do love a good snow day. However, the last two years of "HOLYCOWTHERE'SSNOWLETSALLFREAKOUT" has been a little tiring.


I think that this image defines "Meh."
This is my beautiful curtain that looks
so blah in the low light. 


     Meh. I'm feeling meh. It's just that time of the school year where we teachers start wondering if we've really done all we needed to do, and figuring out our priorities for the last 9 weeks of the year. I've felt a little inadequate in the teacher realm lately due to being completely overwhelmed with paperwork. So I tried to do something this week that would make me feel like I made a positive impact. Which, of course, meant heading to the kitchen. My baking challenge this week was "fillings." Fillings? Fillings. The suggestions were all sweets, which I LOVE and I had so many ideas for all kinds of delicious, provocative, and sinful looking treats that I could make (most involved chocolate), but I challenged myself to go a different direction.


"One day, all of this will be yours." "What, the curtains?"
      See, I am not a breakfast fan. Don't get me wrong, I love breakfast foods. Brunch foods as well! There's so many delicious options! But in the morning, my body would rather be asleep than getting up, and for some reason my stomach wakes up dead last. It takes a while before I really want to eat something! I have learned in the last 2 years that going in to work before 8 and having to be professional while interacting with middle-schoolers takes two things: COFFEE, and breakfast. I usually stick with something like a half a bagel, or a banana, or granola bar...something small and really not that great for breakfast.

     So I made what I will call "biscuitmuffins," because they look like a muffin and taste like a biscuit. And I stuffed them with scrambled eggs, bacon, and some cheddar cheese. It's a sneaky way to add protein (and CHEESE omg) to an otherwise carb-based breakfast. I thought it might be a way to start changing my breakfast habits. Plus, it's just the size of a muffin (some were smaller than this one, even) so they were perfectly sized for my lacking morning appetite. Not only that, but they taste great. Like, really really great. Like the kind of great that makes your same sex coworkers ask how your marriage is, because they want you to get divorced and then they can marry you and you can cook for them all the time.

Cheesy bacon biscuitmuffin deliciousness.
Also, next up...photo editing software. 

     I followed the dough recipe from this site, and the process, and it made exactly 8 biscuitmuffins.  Looking back I could have made a few of these a little smaller and made 10, but that's really just me being picky. Happy eating!!


Thursday, March 19, 2015

St Patty's Day Tradition! aka MOAR CUPCAKES

NOMNOMNOMNOMNOMmmmmmmmm...


     That is what it sounds like at work when I make cupcakes for a baking challenge. And for the St Patrick's day themed challenge, cupcakes were a must. I know they go around Pinterest like crazy, but I love making these. I've been told they should not be called "Carbomb cupcakes" as the internet calls them. Instead they should be called "Guinness Cupcakes with Whiskey fudge filling and Baileys frosting." I have been told via Reddit that the former title is offensive to Irish and that posting these on St. Patricks day is apparently ignorant.  I figured they were named after the drink which contains all of those elements, but then I learned that is also offensive.  Regardless of the name origin, unintentionally connected history, or lack of Irish-ness in general, these cupcakes taste phenomenal. And to me, they embody all the fun bits of the American version of St Patrick's Day shenanigans and incorporate some out of the ordinary baking ingredients. Guinness! Whiskey! Bailey's! Hooray!


     I followed a conglomerate of recipes because I've completely forgotten my "go-to" website for these babies. The cupcake and frosting recipes came from Liquor.com. The process was easy enough to follow, although I made a mess of it the first go around (of course). They turned out tasting light, fluffy, and chocolatey, but they were so light, actually, that when I put them in my cake holder to keep for the week, they starting melting- and not the frosting...the cupcakes! They were maybe a bit too light, but taste was not a factor. Also, I'm really not a fan of using mascarpone cheese in frosting, as it makes the frosting turn out a bit too soft for my liking. I had a lot of leftover frosting (hubs is not complaining) because I had to add more butter to stiffen it up! Again, however, it tasted delicious. It's hard to say if I'll keep using this recipe in the future.

The filling recipe came from Country Cleaver and OH MY WORD was it easy, delicious, perfect, and marvelous. Mmmmmmmmm.

Fudgy, whiskey-y goodness.

For me, baking is relaxing. Except for the whole "stressing out that I want it to turn out perfect, look perfect, and taste perfect" thing. Typically whatever I make looks like a hot mess, but tastes great! Curb appeal? Eh who needs it. I enjoy the process of making something and having it turn out to be pleasing, either to me or someone else. The feeling of accomplishment is very satisfying, especially when it tastes great as well!


So adorable!
This weekend was the jackpot, though. THESE cupcakes are absolutely sinful and somehow I hit the trifecta of not falling apart, tasting amazing, and looking pretty good too.
                                                       
                                    
                                    Happy St. Patrick's Day!


Friday, March 13, 2015

Just a Blue Moon and I

     Today at work was a "catch up on meetings/paperwork/getting things done" day for me, and therefore my students. While I was leading IEP meetings, working on paperwork, and getting caught up from all our snow days, my students were also catching up on finishing work they hadn't finished from this past week! Woo woooo productivity!

     Seeing as how that's the theme of the day, I thought I'd catch up and write a megaton of posts tonight. Or just 2. Also my husband is busy with work stuff this evening so it's just me. Correction: me and a blue moon. We are here, trying to keep ourselves occupied after dinner. So blog posts are just rolling in.

     I've got more food to show you!

Please enjoy these camouflage cupcake liners


Notice the crumb trail. I'm a mess.
     These are some of the best cupcakes I have ever made. And while you're scrolling through this post, looking for pictures of the rest of the dozen that I made....well they're gone. I ate them. Or shared a few. But mostly I ate them. I just ate this one, actually, immediately after I uploaded the pictures.

     Red Wine and Chocolate Cupcakes, with a "Red Wine" buttercream. These were my submission for last week's baking challenge.They are heavenly. Decadent but not too heavy, rich but not too dry, and the frosting is just sweet enough to balance out the robust red wine, chocolate, and cinnamon combination in the cupcake. I mixed these up with a hand mixer, since that's all I have, although the recipe says to cream with a stand mixer (Psh). Also, I think I'd want these to taste a little more chocolatey, so I might add 1/2 tsp. cinnamon next time, instead of 1/4 tsp. But that's just me! I still thought these were wholly scrumptious, though, so maybe I'll chicken out and keep the recipe the same the next time I make them...


     Here is a cupcake with my "Blue Moon" towel. I am an avid Manchester City Football (Futbol) fan. I figured I'd put the towel in the picture since I'm drinking a Blue Moon, and because I'm just weird when I'm at home alone on a Friday night.


You can find the recipe over at Tide and Thyme! I'll copy it below as well. Eat up!!

Chocolate and Red Wine Cupcakes
Recipe makes and frosts a dozen cupcakes

8 Tbsp butter, room temperature
1/2 cup dark brown sugar, packed
1/2 cup granulated sugar
1 large egg + 1 large egg yolk, room temperature
3/4 cup Cabernet Sauvignon
1 tsp. vanilla extract
1 cup all-purpose flour
1/2 cup cocoa powder
1/8 tsp. baking soda
1/2 tsp. baking powder
1/4 tsp. salt
1/4 tsp. ground cinnamon
For the frosting:
1/2 cup butter, room temperature
3 cups confectioner’s sugar
1/4 cup Cabernet Sauvignon
1 tsp vanilla extract
Preheat oven to 350 degrees. Line muffin pan with cupcake liners and set aside.
In a large bowl, sift together flour, cocoa powder, baking soda, baking powder, salt, and cinnamon. Whisk to combine. Set aside.
In the bowl of a stand mixer fitted with the paddle attachment, cream together butter and sugars for 2 minutes until light and fluffy. Then add in the egg and egg yolk, as well as the vanilla, beat well until combined.
Add in 1/2 of the dry ingredients, followed by the wine, then the remainder of the dry ingredients. Mix until well combined, scraping the bottom of the bowl if necessary.
Divide batter evenly into lined muffin pan. Bake for 18 minutes then remove from oven and let cool for 5 minutes before transferring cupcakes to a wire rack to cool completely.
In the meantime, to make the frosting, whip the butter until light and fluffy. Slowly incorporate the powdered sugar, as well as the wine and vanilla. Beat until no lumps remain. Frost cupcakes as desired.


Friday, February 20, 2015

Chapter 1: I'll probably forget about posting again for at least a week...


The World, as seen from somewhere in Jamaica (old honeymoon photo)
Hello world! 


      I have long wanted to begin an online presence to share art, poetry, ideas, recipes, or whatever else my little heart desired, but I've run into roadblocks. Not enough time, not having a functioning computer, forgetting to post, and, let's be real, a lack of material. I do not have the most interesting thoughts!

      Most of my thoughts revolve around a running to-do list in my brain, where my synapses are constantly sending a signal to one place and then another. It sounds like "don't forget to do laundry if you want your favorite running socks for your run tomorrow...I should actually put some socks on since my feet are cold!...speaking of cold, it will be spring and summer before you know it...oooh summer project list!...oooh summer travel list!...ooh lack of funds for most of the ideas that just got put on those lists....sigh...." and continues pretty much until I fall asleep. In the words of one of my good college friends, "WOMP." 


A "Work in Progress" snapshot.
Much Work.  Such focus. 
  So, now that the introduction to this blog is as thrilling as any I could spend months tweaking and working on, let's get started with material I DO have on hand. I've been participating in a "baking challenge" this year. Basically, I follow the 52weeksofbaking subreddit and each week they post a new challenge for the week. Could be an ingredient, maybe a theme, maybe a type of baked good; whatever it is I have a week to come up with my submission and upload a photo. 

      What reward is there? Is it a contest? I get these questions a lot. The answer is: several months ago I was griping to my husband about how the frosting on these cookies I made just did NOT look the way I wanted to. I had a white whine moment where I was all "these look SO ugly. This is not what I had pictured! HOW is this possible, I did all the things I should have done to make these turn out so cute, but they just look fugly. FUGLY!!" He did the traditional husband eyeroll and went straight into a very parental "Well, if you want to get good at decorating cookies, you're just going to have to practice more often." First, my brain did that synapse-running thing "I don't need practice! This is not a difficult task...although this is probably the 2nd time I've used this frosting and decorated sugar cookies with it...okay but really he just wants me to make cookies and cupcakes more often and he doesn't actually care what they look like..." etc. But approximately 30 seconds into that I thought, "Well, he's right!" 

1st photo attempt...The salt & pepper
are hiding a mousetrap. EW. What
was I thinking?!

     Hence the challenge. As the New Year began I was thinking of what my resolution would be. My resolution is usually something I decide to spend the year accomplishing. One year I set out to find facial cleansing products that did their job without destroying my skin or causing breakouts. One year it was do a better job cleaning out my closet (and bookshelves and whatever else I owned) and donating. This year, I decided, it would be to a) make better use of half the baking pans and trinkets I own but don't use very often, and b) try new baking things and get better at things I already do (such as decorating cookies).  This week's challenge was to  bake something that went with the theme of Chinese (or Lunar) New Year. I decided to make fortune cookies! 

      I used this recipe from ifood.tv mostly because the video was very helpful in learning to fold the cookies. The first round was definitely a little tricky, but after that it just got easier with each batch! This was definitely a fun challenge. Also a good snow day project- since you only make 3 at a time, well, it took a good part of the day to get them all done (It's not included on that website but one batch made about 45 cookies). 


Beautiful fortune cookies! Much better photo op. 


      I really should have ironed that cloth before taking those photos. Oops. So there's the first post. You got an idea of why you probably don't want to read this blog EVER again, then maybe I woo-ed you with a few nice photos (and one horrible one. I'm trying to show how multifaceted I am. Is it working? Guys?). And now you are thinking "Well, maybe the next post will be more graceful. I'll stick around to find out." Saaaaame thought my mother has had about me for 26 years, folks. But I'd appreciate it if you'd check out the next post just to check! Thanks for reading!